Monday, October 22, 2012

Happy Birthday, Iz!

Hi Everyone!

This week is a big birthday week! It's my 28th birthday on Thursday and my niece's 7th birthday on Sunday. She unfortunately lives in North Carolina, so I will celebrating her from a distance. I will have to get this Nesting Doll card in the mail tomorrow!

In honor of my birthday, I'm treating myself to a little something each day :). Tonight my treat was time to craft and Rock of Ages on Redbox, which is on right now in the background (LOVE the 80's music).

I'm submitting this card to Peachy Keen Stamps: "Just Cards - Word-up Challenge." Making this little doll was actually VERY EASY! It didn't take me as long as my cards normally do. Though this little nesting doll has an ADORABLE face, I do think the sentiment is front and center!

Materials used:
  • Cricut Cindy Loo for the Babushka cut
  • My gypsy to weld the Babushka cut
  • Peachy Keen "Princess Faces"
  • sizzix embossing die for her top layer
  • gell roll pen for her little freckles
  • Tsukneko inks for all of my cuts in coordinating colors
  • My Creative Time's scallop and circle dies and coordinating sentiment
  • button
  • scrap ribbon for her little hairbow
Here is a close-up of the sentiment.


Hope everyone has a wonderful rest of the week! 

<3, Katie A. 


Wednesday, October 17, 2012

Happy Haunting Wreath!

Hi Guys!

Hope you are having a great week! So happy that Friday is almost here. Today I have a post for you right in what I THOUGHT was the nick of time to submit to the Peachy Keen Color Challenge #39, but I missed it! SO SAD!!!!! Oh well. :( I will submit it to: Twineology October Spook-tacular Challenge, and Cupcake Craftroom "Anything Goes in Autumn" Challenge.

I have to say, for getting this done tonight, I'm pretty proud of it! :) It's going straight to my classroom in the morning! We'll see if my kids love it as much as I do. lol.


Materials:

  • About a 6 inch wreath wrapped in purple ribbon
  • Peachy Keen Princess Faces for my cute, little witch's face on the bottom, Peachy Keen Everyday Face Assortment for my monster (I use my own M.A.C. blush for the little cheeks and apply with a q-tip) I thought I would let you in on the secret. :)
  • Cricut Paper Doll Dress Up 
  • Mini Monsters for the monster, the spiderwebs, and the "Happy Haunting" sentiment
  • pinwheels using my Martha Stewart scoreboard
  • sizzix embossing folder for the sentiment and roof
  • lots of buttons and random ribbon
  • baker's thread


Thanks for visiting! Hope you have a great rest of your week!

<3, Katie A.

Sunday, October 14, 2012

Trellis Card

Hello!

Today, I have a card to submit to a couple of challenges:
Emma's "My Creative Time" Thursday Designer Challenge and "Little Scrap Pieces," Fun Friday Fall Colors Challenge.

For Emma's challenge, you had to use 3 flowers plus bling on a layout or a card using brown, pastel yellow, and pastel blue. The card base and the brown ribbon looks very fall to me, which is why I also submitted it to Little Scrap Pieces challenge. Emma's flower requirement inspired me to make a background that resembled a trellis, and the vision only came halfway to fruition. :) I just started by adhering ribbon in a cross cross fashion.

Instead of having 3 flowers spread out, I stacked 3 flowers.


Materials on the outside of card:

  • flower layers: on the bottom I used Tim Holtz "Tattered Flowers," the middle is Emma's scallop and circle die (the scallop is stamped using Emma's Build a Banner Kit polka-dot stamp), and the top is Emma's rolled flower die.
  • a little iridescent gem in the middle of the flower
  • the sentiment is from Emma's "All Around Everything"
  • brown ribbon

Materials on the inside of card: 

  • blue cardstock to cover the brown ribbon that was criss crossed on the front.
  • flower layers: on the bottom I used Tim Holtz "Tattered Flowers," the middle is Emma's scallop and circle die (the scallop is stamped using Emma's Build a Banner Kit polka-dot stamp)
  • the sentiment is from Emma's "All Around Everything"
This was a very simple and easy card! Thanks for visiting me. Hope you have a wonderful week!

<3, Katie

Saturday, October 6, 2012

Just a Note!

Hi Everyone,

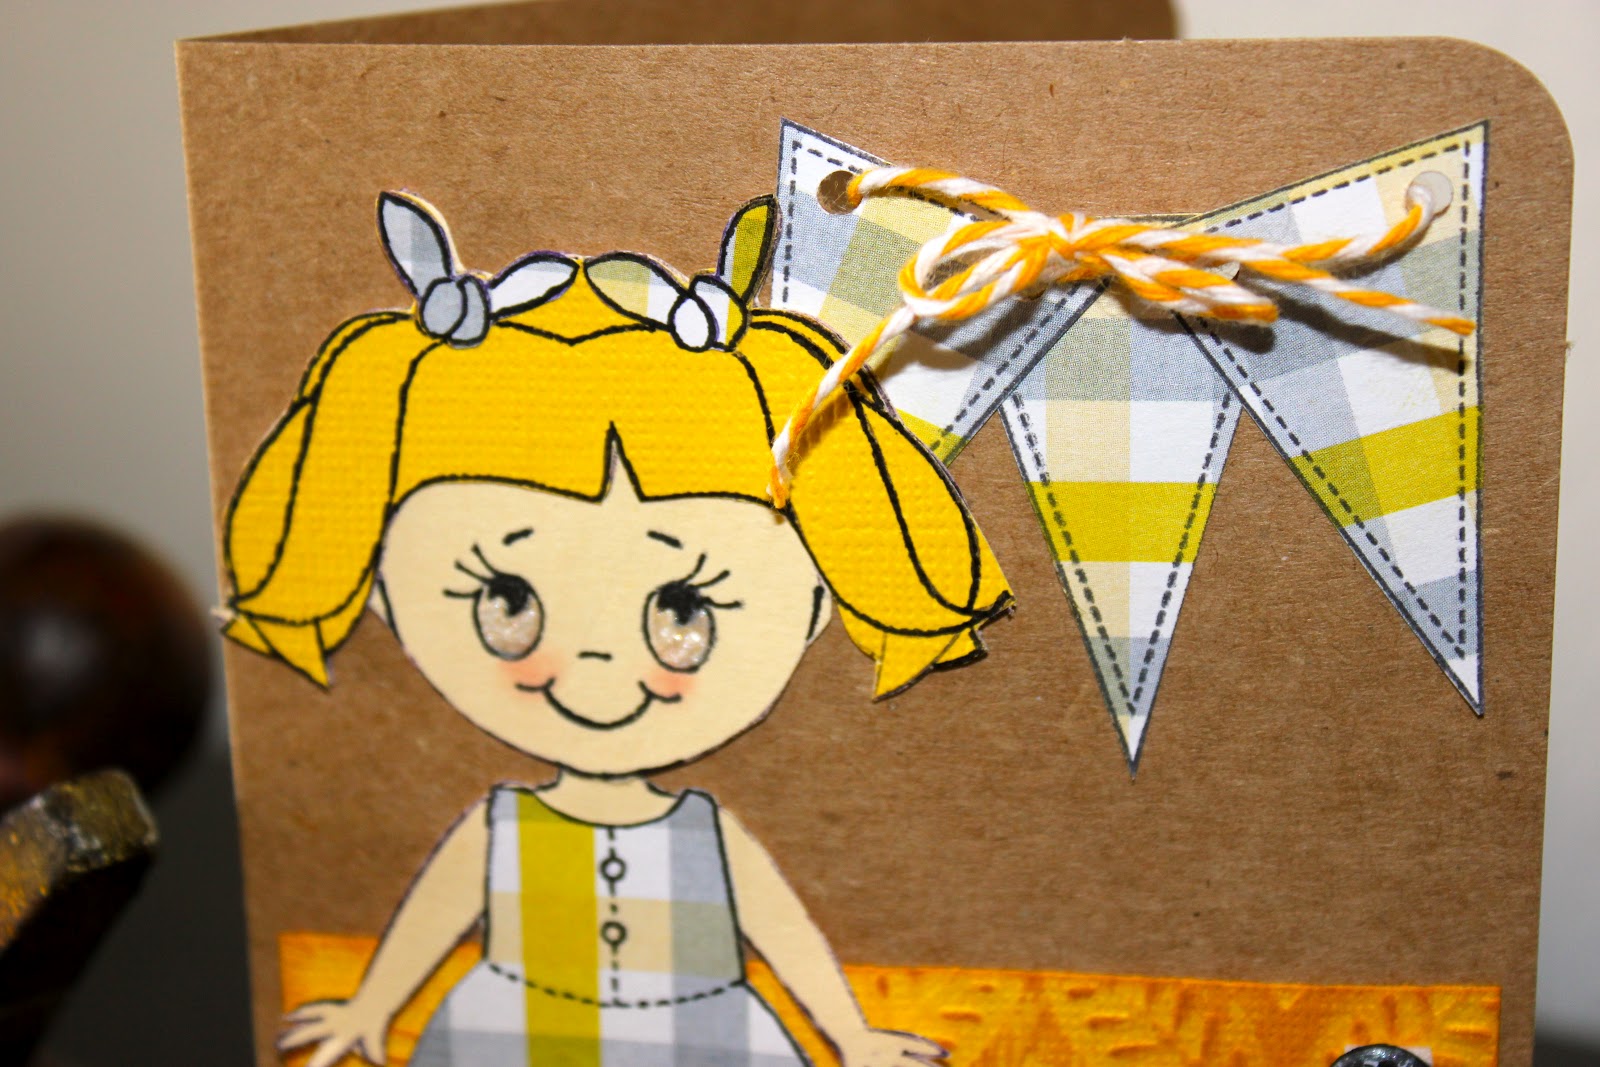
A quick post for you this weekend: "Just a Note" Greeting Card was made with lots of love using:

  • Peachy Keen Stamps: PKSC-07 July 2012
  • Cuddlebug Embossing for the back yellow panel
  • faux brads w/ pop dots
  • Scrappy Moms Sentiment
  • Baker's twine for the banner


As I paper pieced the various details for this little girl, my husband and my sister told me I was crazy because of how labor intensive it was. However, her little gingham dress makes all of that time worth it! :) I will be submitting this card to the Peachy Keen Challenge 38 :: Anything Goes.

Have a wonderful rest of the weekend!

<3, Katie

Sunday, September 30, 2012

Happy Birthday in Advance!

Hi Crafty Friends,

Hope this post finds you well! School in session means very limited time, but for the first time since I've started teaching 4 years ago, I am trying to achieve balance during the school year, which means I'm allowing myself time to do the things I love amidst the tons of essays to grade and lessons to plan.

I like to keep a couple of birthday cards in my greeting card stockpile so that I will be prepared for various birthdays when they arrive, and Fantabulous Cricut Challenge #30 - Birthday Celebration inspired me to make a new card to add to my inventory.

My sister has already lay claim to the card for her birthday, but I'm not so sure that I want her to have seen her birthday card before she actually receives it. :)

Ingredients:

  • Cricut Simply Charmed (fashioned on my Gypsy) If you do this, before you weld the 2 cakes together, don't forget to flip the image so that the 2 sides align when folded.
  • cuddlebug embossing folder for the candles
  • white gelly roll for faux stitching 
  • Peachy Keen Faces (PK 112 - Cherub Face Assortment)
  • Scrappy Moms Sentiments
  • Assorted yellow ribbon


Have a wonderful week, everyone!

<3, Katie

Tuesday, September 4, 2012

Best Witches!

Hi Everyone!

Wow! It's been awhile; even though I was on summer vacation for awhile, I was very busy finishing my Master's thesis in English, and so even though I did make a bunch of greeting cards for people along the way, I didn't find time to blog about them. I wanted to get at least one blog in before I go back to teaching my high schoolers tomorrow! :)

This project is definitely blog worthy, and I will be submitting it to both Peachy Keen Stamps Blog Challenge 33 and Kraft Girls Challenge: Anything Goes. I got this cute little greeting idea from Emma over at My Creative Time who just came out with a new Halloween sentiment stamp "Best Witches." I ran with it and came up with this adorable (AND CHEAP!) way to adorn a table or mantle.

Recipe for the Brew:

  • Peachy Keen Happy Lashes for my cute, little witch's face on top
  • Peachy Keen Princess Faces for my cute, little witch's face on the bottom
  • Cricut Paper Doll Dress Up - witch dolls
  • Cricut Storybook - Lettering 
  • Toilet paper rolls covered in paper and cut in half as the letter bases
  • Paper box wrapped in scrap fabric
  • Green ribbon from Costco
  • Twine around each little witch's hat
  • My own blush from my makeup for their little cheeks
  • Little mini silver canisters from a wedding favor pack that I found at Marshall's for the bases on the bottom


Happy Early Halloween, everyone! FYI, I will be selecting a random winner to win this cute decorative greeting along with a Christmas themed one when I reach 50 followers!!!!! :)

<3, Katie A.

Tuesday, July 3, 2012

Altered Day Planner

Hi Everyone,

I bought this day planner at the Dollar Tree awhile back and have been using it with its original bland blue cover, and this week's Color Inspiration Challenge over at Peachy Keen inspired me to FINALLY revamp it. I've been meaning to do it for a long time, but seeing as how long it took me, I'm glad I didn't try and accomplish it before my summer because I wouldn't have had time! :)

My husband and I are in the home buying process, and I'm dreaming that one of the bedrooms will become a craft room. Once I have a craft room, I'm hoping that projects will take less time if I have designated stations for things...Crafty friends with awesome craft room, do you think that's true? I just find that inaccessibility of paper and what not causes me to dig through EVERYTHING every time I have a project.

If you go to Peachy Keen Stamps Website, you will find Amy's "Kitty Notebook Tutorial by: Amy Crockett," which is where I got the instructions for altering notebooks. Thanks, Amy for the amazing instructions!

Here is a full shot of the notebook. I'm entering this notebook into the Peachy Keen Color Inspiration Challenge #24.

Materials used:

  • Day Planner (I discarded the original front cover after using it as a template and ended up with a very durable chipboard cover covered int his awesome animal print paper)
  • Cricut Cindy Loo for the Babushka cut
  • Cricut Feelin Groovy for the letters in my name
  • stamp from unknown brand for the banner
  • Peachy Keen Create a Critter Face Assortment for the Babushka face
  • the back panel is made from a coordinating piece of paper. 
  • twine for the vertical strings that are tied and for our little doll's bow in her hair.
  • flocking powder
  • gell roll pen for faux stitching on letter shadow
  • Tsukneko inks for all of my cuts in coordinating colors


I used the flocking technique for the first time on the outermost layer of our little babushka doll. It was very simple! All I did was run tape from my tape runner to cover the entire piece, sprinkle pink flocking powder over it and finally took my finger and rubbed it all over the piece to make sure the flocking powder applied evenly and to avoid bald spots. I have a Zyron sticker maker, which many people use for flocking, but I don't know where mine is right now (another reason why a craft room is needed, so I can spread my tools out! :)) I used this poker took that I have to poke out the extra flocking powder that got caught in the little holes of the cut.

I paper pieced the two little banners, which was super easy. All you have to do is stamp whatever stamp you want on (in my case 3) different pieces of paper, and then you cut out the shapes and adhere them to your page. 
 I inserted 4 eyelets with my crop-a-dile, which I also had to relearn how to do...I forget some of these techniques (I just googled a youtube video quickly). I strung twine in powder pink and a light green just to add an extra little touch.


Thanks for reading, friends! Until next time...Happy 4th of July!


<3, Katie